Before talking about hotspots, nodes, access points and repeaters, let's briefly compare the digital modes.
Digital voice modes compared
| Mode | Developed by | Codec | Modulation | Access | Bandwidth | Rate | Channels |
|---|---|---|---|---|---|---|---|
| D-STAR | JARL | AMBE+ | GMSK (2FSK) | FDMA | 6.25 kHz | 4800 baud | 1 |
| Fusion | YAESU | AMBE+2 | C4FM (4FSK) | FDMA | 12.5 kHz | 9600 baud | 1 |
| DMR | ETSI | AMBE+2 | 4FSK | TDMA | 12.5 kHz | 2 × 4800 baud | 2 |
GMSK - Gaussian Minimum Shift Keying
4FSK - 4-level Frequency Shift Keying
C4FM - Continuous 4-level Frequency Modulation
FDMA - Frequency Division Multiple Access
TDMA - Time Division Multiple Access
User identification
| Mode | Registration | Identified by | ID shown on the radio | Text display |
|---|---|---|---|---|
| D-STAR | Required | By callsign | Callsign | 4 characters 20 characters |
| Fusion | Not required | By callsign | Callsign | No |
| DMR | Required | By ID | ID/Callsign* | No |
* The callsign is shown when the subscriber ID is in the contact list of the receiving radio; otherwise the subscriber ID is shown.
Repeater linking
| Mode | Local QSO | Link to another repeater | Multi-repeater link | Echo test | Link status query | Callsign routing |
|---|---|---|---|---|---|---|
| D-STAR | Yes | Yes | UR field | Yes | Yes | Yes |
| Fusion | Yes | No | Channel | No | No | No |
| DMR | Yes | No | Room | No | Yes | No |
Using the radio
| Mode | Memory recall | Repeater selection | Mode selection | Programming the radio | Learning curve |
|---|---|---|---|---|---|
| D-STAR | Dial or GPS | Dial | Dial | Easy | Short |
| Fusion | Dial | Keypad | Dial or AMS | Easy | Short |
| DMR | Keypad | Dial | From presets | Hard | Long |
Any hotspot, node or repeater consists of hardware and software and is connected to an amateur radio network.
Hardware
The hardware of a hotspot, node or repeater consists of:
- a computer;
- a modem;
- a level-matching board (optional);
- a radio or a low-power transceiver;
- an information display (optional).
Computer
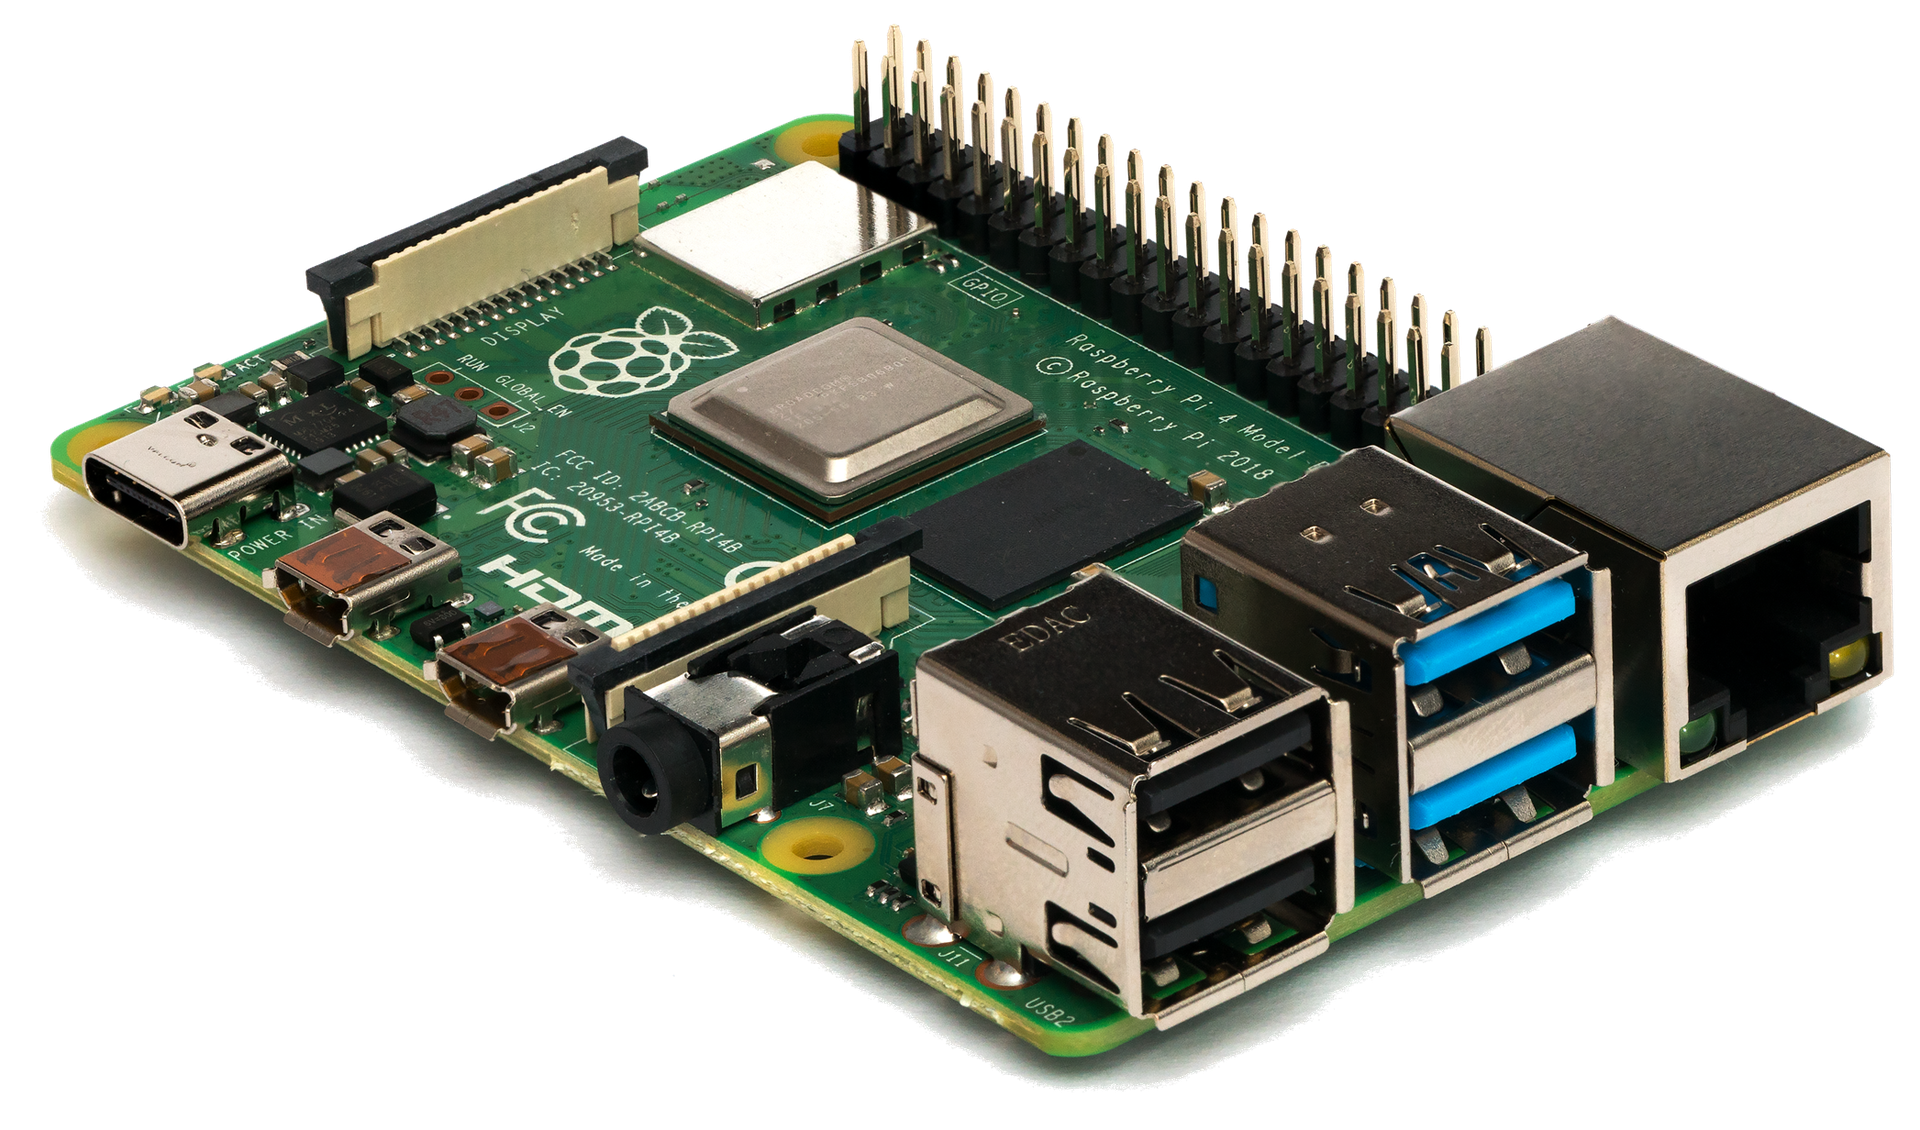
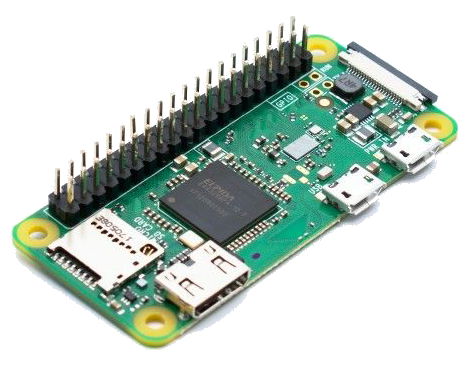
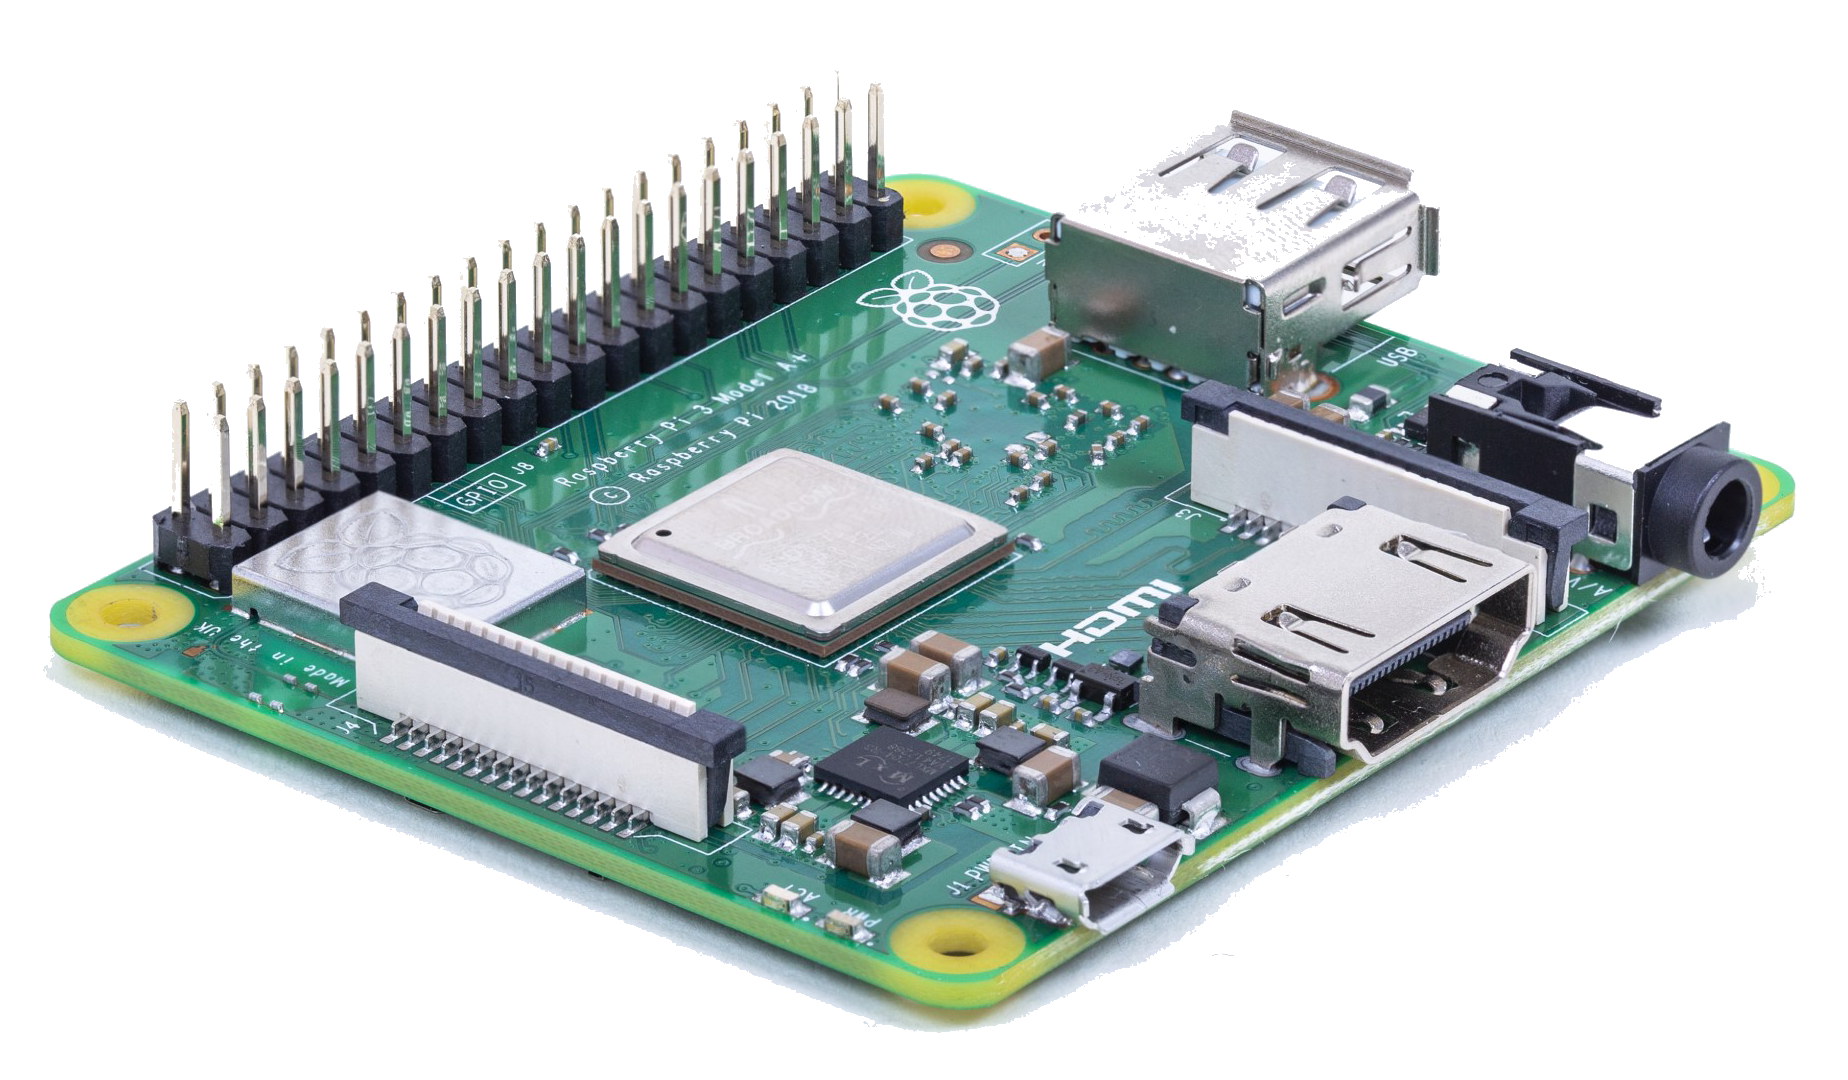
The usual computer is a Raspberry Pi single-board computer. There are plenty of models to choose from: anything from the Raspberry Pi Zero W to the Raspberry Pi 4 will do. The table below lists the models and their specs.
| Released | Model | CPU | Clock | Cores | RAM | GPIO | USB | Ethernet | Wi-Fi | BT | Price |
|---|---|---|---|---|---|---|---|---|---|---|---|
| April 2012 | B | ARM1176JZ-F | 700 MHz | 1 | 512 MB | 26 | 2 ports | yes | - | - | $35 |
| February 2013 | A | ARM1176JZ-F | 700 MHz | 1 | 256 MB | 26 | 1 port | - | - | - | $20 |
| June 2014 | B+ | ARM1176JZ-F | 700 MHz | 1 | 512 MB | 40 | 4 ports | yes | - | - | $25 |
| November 2014 | A+ | ARM1176JZ-F | 700 MHz | 1 | 256 MB | 40 | 1 port | - | - | - | $25 |
| February 2015 | 2B | ARM Cortex-A7 | 900 MHz | 4 | 1 GB | 40 | 4 ports | yes | - | - | $35 |
| November 2015 | Zero | ARM1176JZ-F | 1 GHz | 1 | 512 MB | 40 | 1 × mini-USB OTG | - | - | - | $5 |
| February 2016 | B | Cortex-A53 (ARM v8) | 1.2 GHz | 4 | 1 GB | 40 | 4 ports | yes | 802.11n | 4.1 | $35 |
| February 2017 | Zero W | ARM1176JZ-F | 1 GHz | 1 | 512 MB | 40 | 1 port | - | 802.11n | 4.0 | $10 |
| March 2018 | 3B+ | Cortex-A53 (ARM v8) | 1.4 GHz | 4 | 1 GB | 40 | 4 ports | Gigabit | 802.11ac | 4.2 | $35 |
| October 2018 | 3A+ | Cortex-A53 (ARM v8) | 1.4 GHz | 4 | 512 MB | 40 | 1 port | 802.11ac | 4.2 | $25 | |
| June 2019 | 4B | Cortex-A72 (ARM v8) | 1.5 GHz | 4 | 2, 4 GB | 40 | 4 ports | Gigabit | 802.11ac | 5.0 | $35, $55 |
Modem
While the choice of computer hardly matters, the modem deserves a careful choice. The modem decides the computer and the radio part (the radio modem), and whether the device ends up a hotspot, a node or a repeater. There are countless modems on the market, some with a low-power transmitter on the same board. Here are popular and affordable ones:
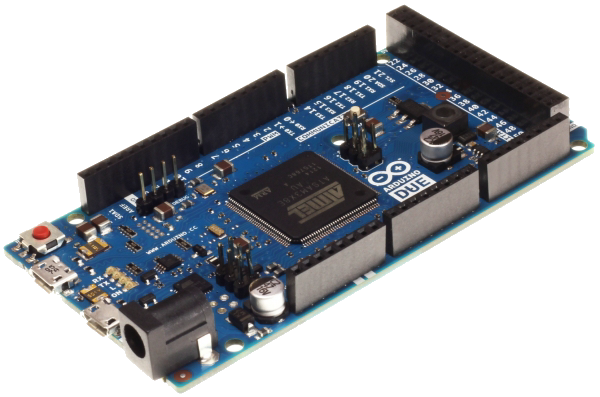
- Arduino Due
- MMDVM POG
- MMDVM LJT
- MMDVM HS HAT
- MMDVM HS HAT Dual
- MMDVM HS HAT Dual (LoneStar) N5BOC
| Spec | Arduino Due | MMDVM POG | MMDVM HS HAT | MMDVM HS HAT Dual | MMDVM HS HAT Dual (LoneStar) N5BOC |
|---|---|---|---|---|---|
| Transceiver | --- | --- | 1 × ADF7021, TCXO 14.7456 MHz | 2 × ADF7021, TCXO 14.7456 MHz | 2 × ADF7021, TCXO 14.7456 MHz |
| Modem | Atmel SAM3X8E ARM Cortex-M3 | ST-Micro STM32Fxxx | ST-Micro STM32Fxxx | ST-Micro STM32Fxxx | ST-Micro STM32Fxxx |
| Modem type in Pi-Star | STM32-DVM/MMDVM_HS RPI HAT (GPIO) | STM32-DVM/MMDVM_HS RPI HAT (GPIO) | STM32-DVM/MMDVM_HS RPI HAT (GPIO) | STM32-DVM/MMDVM_HS RPI HAT (GPIO) | MMDVM_HS_Dual_Hat (DB9MAT, DF2ET & DO7EN) for Pi (GPIO) |
| Operation | Simplex, Duplex | Duplex | Simplex | Duplex | Duplex |
| Antenna | --- | --- | 1 x SMA | 2 x SMA | 2 x SMA |
| Frequency | --- | --- | VHF, UHF | VHF, UHF | VHF, UHF |
| Output power | --- | --- | 20 mW | 20 mW | 20 mW |
| Displays | --- | --- | OLED, Nextion | OLED, Nextion | OLED, Nextion |
| Board size | 101.52 × 53.3 × 20 mm | 65 × 65 × 10 mm | 65 × 30 × 20 mm | 65 × 56 × 20 mm | 65 × 30 × 20 mm |
| Fits | Pi3, Pi4 | Pi3, Pi4 | Pi3, Pi4, Pi0W | Pi3, Pi4 | Pi3, Pi4, Pi0W |
| Price | $20 | $30 | $25 | $35 | $100 |
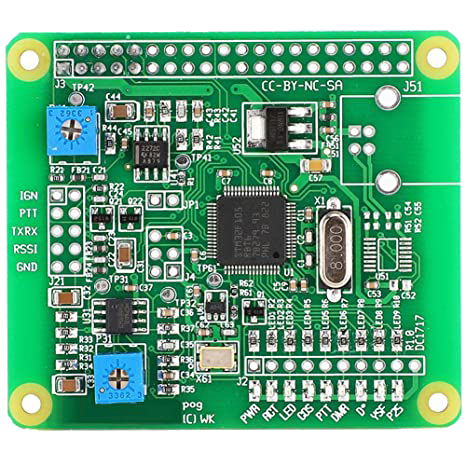
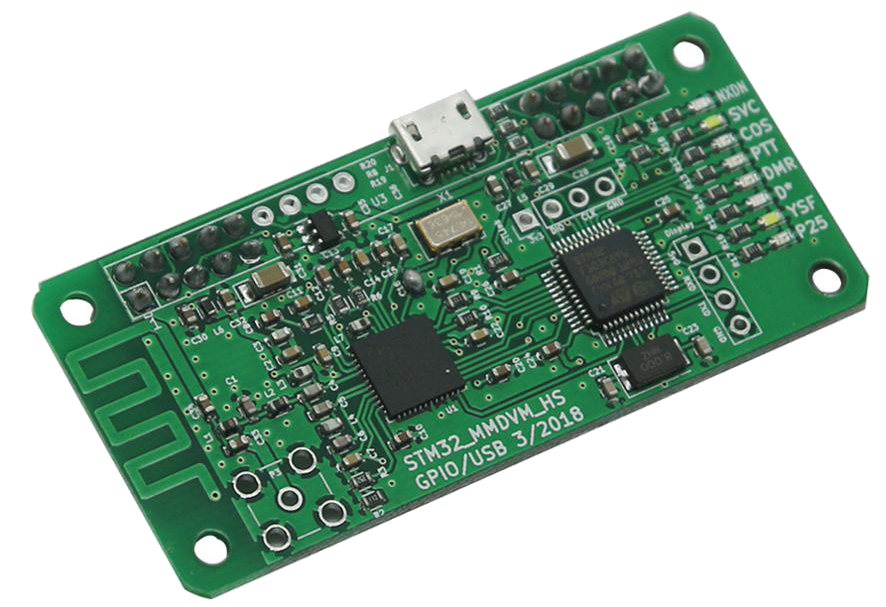
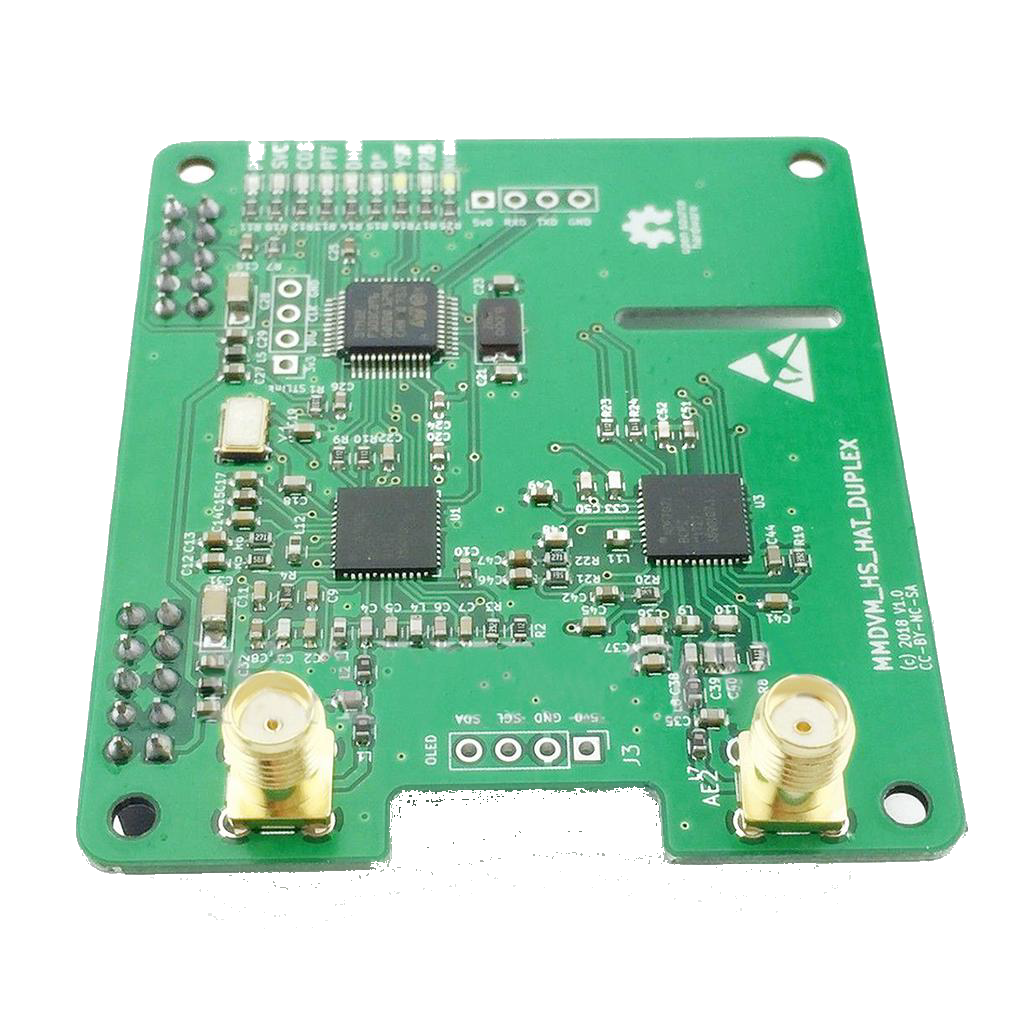
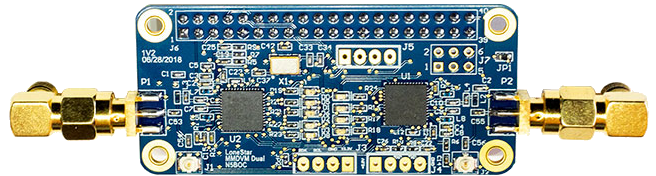
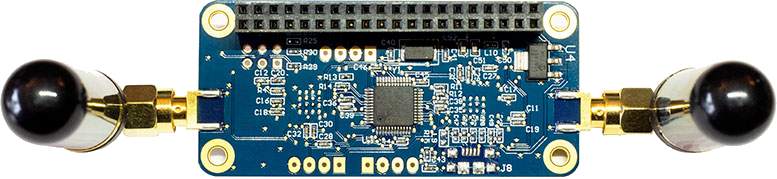
As the table shows, the ready-made modem / radio boards are built on Chinese RF7021SE (ADF7021) radio modules and STM32Fxxx modems.
The RF7021SE (ADF7021) radio module:
- Frequency range 80–650 MHz;
- Output power up to +13 dBm (20 mW);
- Sensitivity −115 dBm (0.4 µV);
- Supply voltage 2.2–3.6 V;
- Current draw 26–30 mA.
The RF7021SE (ADF7021) is not outstanding in sensitivity, selectivity, blocking, out-of-band suppression or dynamic range. In a noisy environment expect up to 1 km; with line of sight in the countryside, up to 10 km. A stable modem needs a high-stability TCXO of 2 ppm or better — I recommend the FOX924B-14.7456. Ready-made boards already have one; the Arduino Due needs it added, since its own oscillator is not stable enough.
Level-matching boards
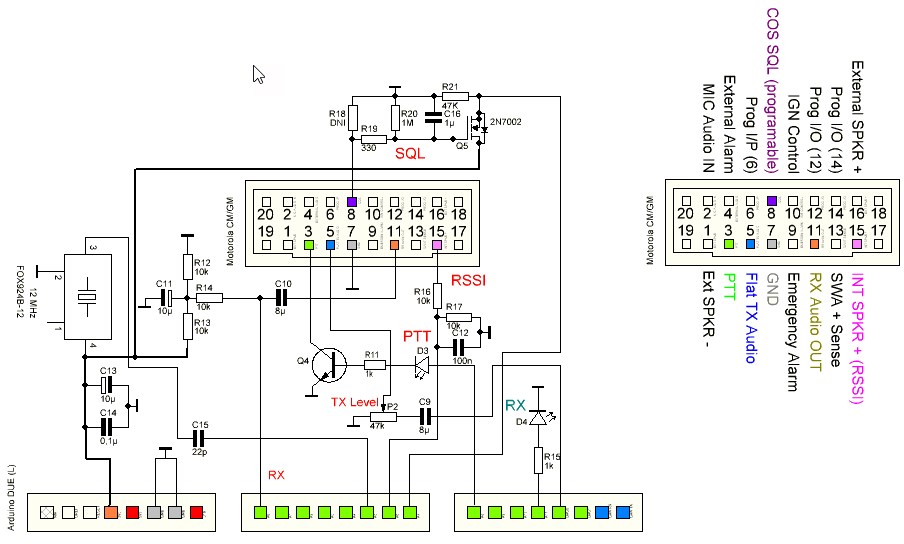
The name says it all: the board matches the levels of the modem and the radio. In most cases the matching circuits are already on ready-made modems and transceivers. One of the few cases that needs a separate board is an Arduino Due used as the modem. You can buy one or build it yourself. Of the ready-made boards I recommend the SP8NTH v 6.2. To build one yourself, I recommend the NTH pinout with bias stabilisation. Below is the version I used:
Radio or low-power transceiver
This part is simple. A hotspot uses a ready-made radio modem board with a low-power transceiver. A repeater needs a pair of radios, a node just one. The classic choice is the Motorola GM340, but in practice any radio with 9600-baud support will do. When choosing a radio, look at the usage statistics on the BrandMeister site. Keep in mind that the best receiver bandwidth depends on the mode: set the IF width to 25 kHz for DMR/C4FM and 12.5 kHz for D-STAR.
Information display
A display is optional on a hotspot, node or repeater, but makes life much easier, especially without a dashboard. The usual choices are:
- OLED 0.96" or 1.3" (depending on the radio modem board and the case);
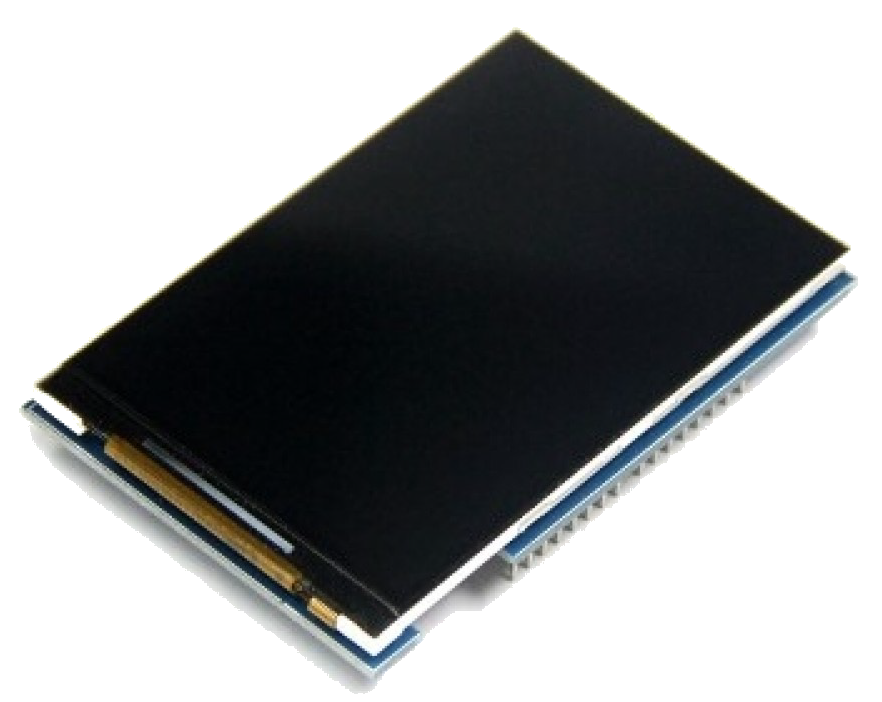
- Nextion of any version.
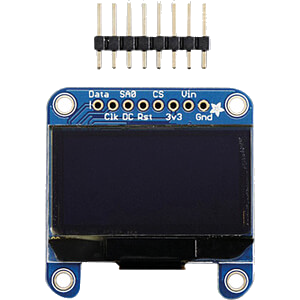
An OLED display is easy. A 0.96" or 1.3" OLED will do; inside they are identical, 128 × 64 px. It is soldered to the radio modem board on the 3V3, GND, SCL and SDA pins and enabled in MMDVM Host. It shows the basics: the mode, the subscriber ID/callsign and name, the current talk group.
A Nextion display shows more and does more than an OLED. The most popular models are NX3224K024_011R and NX4832K035_011R. The Nextion connects either to the radio modem board (5V0, RXD, TXD, GND) or through a USB-UART adapter to a USB port of the Raspberry Pi (when the board has no such pins). It has to be flashed first, either over the same USB-UART with Nextion Editor, or from a microSD card.
As for firmware: if the Nextion only shows a little (2–3 lines) and does not control the MMDVM device, the simple firmware by G4KLX or ON7LDS plus the MMDVM Host settings is enough. For a rich multi-line display that also controls the MMDVM device, install the Nextion Driver for MMDVM from here or from here. I recommend taking Nextion display firmware from here. When picking a firmware, mind the display model and its screen size.
Software
The software of a hotspot, node or repeater is built on the open MMDVM platform (Open Source Multi-Mode Digital Voice Modem). There are many images for the Raspberry Pi; the most popular come from the PI-STAR project. They come with the most complete set of preinstalled components and a web panel to manage them. Here are the components:
| Component | Purpose |
|---|---|
| MMDVM Host | Part of the MMDVM platform. Connects to D-STAR, DMR, YSF, NXDN and P25 networks. Connection: Bridge. |
| DstarRepeater | Repeater. Turns the device into a D-STAR access point/repeater. |
| ircDDBGateway | Gateway. Connects to the D-STAR network. Connection: Gateway. |
| TimeServer | Utility. Announces the time in D-STAR mode. |
| DMR Gateway | Gateway. Connects to the DMR network. Connection: Gateway. |
| YSF Gateway | Gateway. Connects to the YSF network. Connection: Gateway. |
| P25 Gateway | Gateway. Connects to the P25 network. Connection: Gateway. |
| NXDN Gateway | Gateway. Connects to the NXDN network. Connection: Gateway. |
| DAPNET Gateway | Gateway. Connects to the DAPNET network. Connection: Gateway. |
| YSF2DMR | Software transcoder from YSF. Connects to DMR. Connection: Gateway via YSF GW. |
| YSF2NXDN | Software transcoder from YSF. Connects to NXDN. Connection: Gateway via YSF GW. |
| YSF2P25 | Software transcoder from YSF. Connects to P25. Connection: Gateway via YSF GW. |
| DMR2YSF | Software transcoder from DMR. Connects to YSF. Connection: Gateway via DMR GW. |
| DMR2NXDN | Software transcoder from DMR. Connects to NXDN. Connection: Gateway via DMR GW. |
| NXDN2DMR | Software transcoder from NXDN. Connects to DMR. Connection: Gateway via NXDN GW. Not included in Pi-Star. |
| Pi-Star Remote | Utility. Switches MMDVM modes from the radio. |
| Dashboard | Shell. Manages MMDVM through a web interface. |
As said at the start, D-STAR uses the AMBE+ vocoder while DMR, C4FM, NXDN and P25 use AMBE+2. So transcoding between DMR, C4FM, NXDN and P25 is done in software, while D-STAR to DMR, C4FM, NXDN or P25 needs AMBE3000 / 3003 / 3006 / 3012 hardware. You can build the transcoder yourself or buy one. Suppliers: DVSI's Hardware Solutions, NW Digital Radio and DVMEGA.
Cross-mode settings are described in detail in this article. As said above, cross modes with D-STAR are impossible without a hardware AMBE transcoder. Ready-made modem/transceiver boards have none, so they have no D-STAR cross modes. The only hotspot I know with an AMBE chip is the OpenSpot3. This page lists its cross modes.
So Pi-Star is a multi-purpose build and is recommended for hotspots. Download Pi-Star from this link. Installation and setup are described in this manual. Problems with this build are discussed on the forum.
For access points and repeaters, though, lighter and more stable custom builds are better. A good example is the KAVKAZ build, available at this link. You can also make your own build. You will need:
- A tool to write the OS image. I recommend: balenaEtcher or Win32 Disk Imager.
- The operating system image: take the latest or one from the archive of older versions (another archive).
- The software core is available here or here.
- Cross-mode software transcoders are available here.
- And some Linux know-how.